Bressingham Nursery 'Back to Nature' Project
In recent years rising costs and cheap imports from the continent meant the Nurseries became no longer viable and were closed leaving the land and ageing equipment behind. Seeing an opportunity the staff and volunteers of the steam museum have been working with the Bloom family on an ongoing project to take the estate back to nature.
This project involves many aspects, one of which is removing the poly tunnels used when the nursery was operating. This has created large areas of open ground which you will see on your journey. These areas presented a great opportunity and have been ploughed and sown to wild flower in the summer months to the great benefit of the extensive wildlife living in the grounds, including some interesting and rare species. We now have a pair of red kites nesting which are often seen hunting, not to mention a large population of deer, owls, bats, partridge, native and dark coloured Japanese pheasants. There are also incredible variations of insect life which all go towards creating a thriving eco system. Much more work has also been done rejuvenating the ditches creating a great habitat for endangered water voles, plus over 30 bird and bat boxes for finches to barn owls.
You will notice that many other parts of the land by the railway are being used to graze livestock including cows, rare breed sheep (look out for the lambs in the early part of the season!) and sometimes several horses. Some of the old buildings which look like they are empty have also been given a new lease of life and now provide housing for bee hives in order to pollinate the large flower meadows we have created.
If you would like to volunteer or contribute to this project please visit our Membership/Donations page or Contact us.


Bressingham Steam Society 'Martello Restoration'
To find out how to support our projects visit our Membership and Donations page.
PROJECTS
The overhaul and return to steam of Victorian tank engine ‘Martello’ (LBSC A1X No. 662) is our most recent and high profile project at Bressingham. The engine had an active career up to 2011, visiting many preserved railways on hire but unfortunately had to retire from traffic early due to a number of problems with its boiler.
Now the plan to restore this engine and re-instate standard gauge steam passenger rides is almost complete. Bressingham Steam Society initiated this project, with support from the museum. The main work involved a boiler lift and full replacement of the tubes and refurbishment of the chassis. The condition of the boiler and chassis were good and mainly required metalwork cleaning and repainting. It was an aim to raise a large proportion of the funds from within the society, who also managed the restoration, provided the workforce and will oversee Martello’s subsequent running. The remaining costs were covered by public subscriptions/donations and included driver experiences and other incentives. Details of our current ongoing upkeep scheme are now set out on the membership/donations page.
Work began during the winter of 2014/15 and progressed throughout the 2015 season; the boiler overhaul itself becoming a working exhibit within the museum. The objective was to have Martello return to steam by the 2016 season, which has been achieved. The locomotive will remain predominantly at Bressingham and make use again of the museum’s standard gauge demonstration track, which had been out of action for some years due to lack of motive power. It was planned to have the Society’s ex LMS brake van restored at the same time. This will then be used to carry visitors behind the loco. Work has been underway on the brake van for some time, although there is still some interior refitting and modifications to the brake system required to make it compatible. Although the main overhaul project is now complete there are still ongoing costs such as the brake van. So further donations are always welcome. It is hoped and expected that the brake van will be available for public rides and the loco for footplate experience courses during the 2017 season.
This is a very exciting venture for the society, being the first major overhaul it has undertaken. The choice of locomotive is also fitting, as Martello has become something of an ambassador for Bressingham, in addition to being an interesting machine in its own right. Now in steam again it is (along with the other operational ‘Terriers’) one of the oldest running locomotives in the world. Built in Brighton by William Stroudley in 1875, it celebrated 140 years in 2015.
See the News, Martello gallery and history pages for full details of the locomotive.
Projects recently completed
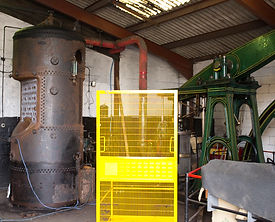
Repair of Cochran boiler
This vertical boiler provides steam for our working stationary engines. It dates from the 1950's. The tubes had become life expired rendering it unuseable for some time. This meant we could not have our beam engine operating. A small project led by Bressingham volunteers raised funds from within the Society and undertook retubing and other minor repair work on the boiler. It is now recertified and able to provide power once more for the beam engine and two other stationary engines installed in the adjoining gallery.

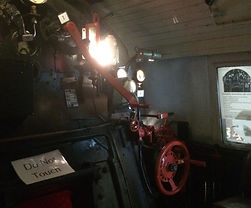
Repaint of German 'Kreigslok' - 'Peer Gynt'
A wartime German built type 52 'Kreigslok' locomotive (named at Bressingham 'Peer Gynt') has been on static display for many years. In recent times however it had become decidedly weather worn in appearance. A small team of Bressingham volunteers undertook to repaint the locomotive in black livery, using Zinsser paint provided by Tor Coatings. The paint proved extremely effective, requiring in places only one application and this over corroded metal work.This locomotive is now cosmetically restored and on permanent display in one of our sheds. The cab is open to visitor access, with lighting and interpretation of the controls, so visitors can sit in the crew seats and imagine themselves driving this huge machine.
Refurbishment of signal box
Bressingham's demonstration signal box (originally from Raydon Wood) has also been receiving some TLC from our volunteers. The interior has been tidied up and a new stove installed. There is now a very good exhibition inside on the principles of train signalling, featuring some authentic block instruments and a working lever frame (not connected) which visitors can pull. The exterior has had the planking on the walls and verandah renewed, repaired and repainted into a smart brown and cream livery.
Bressingham Steam Society's miniature railway
Bressingham has recently added to its range of railways with a dual gauge miniature circuit.
It is a joint venture between Bressingham Steam Museum and Bressingham Steam Society.
The circuit is of dual 5” and 7.25” gauge and is about 200 metres in length in an oval formation. It is located behind the main locomotive shed and runs around the existing small heritage fairground site. There is one turntable and set of points and trains follow a unidirectional path to the single platform.
The railway has been built upon a well-ballasted formation with a drainage trench to one side. The track is of steel rail welded to steel sleepers and it is (apart from access points) fenced off from pedestrians.
Its main purpose is as a training aid for Bressingham’s “Young Steamers” club. This is a group of young volunteers aged between 10 and 16 who have a keen interest but because of health and safety regulations cannot be permitted to work on the museum’s passenger carrying railways. The miniature railway offers them an opportunity to develop their skills and interest in railways and steam engines in a relatively safe environment and within the confines of the law.
The principle motive power is a 7 1/4 " gauge 'Stafford' type 0-4-0 steam locomotive, based on the 2ft gauge Bagnall saddle tank design and one of a production model produced by Station Road Steam Ltd. It was purchased as a kit and has been assembled by the Young Steamers under supervision. The railway is also an added visual attraction to visitors of Bressingham, and on occasion will be used for the carriage of fare paying passengers.
We hope it will prove an interesting addition to Bressingham’s already varied collection.
UPDATE FROM ALLAN BERRY
The 30th May 2015 was a Young Steamers day and so started their training involving a steam engine. The first job was to put the 7¼ʺ gauge Stafford loco onto the turntable, once that was completed, being mindful of all the Health & Safety aspects, we could start on raising steam, which is another part of their training. I drove the loco round the track, then the Young Steamers, under my strict supervision each had a turn. As we had to cancel the previous weekends public running, due to bad weather and as several members of the public expressed an interest in the railway, we ran about ten trips for the public, Geoff Calver driving the first one and myself driving the subsequent runs. The Young Steamers had a go at driving in between the public rides before, near the end of the day, it was time for more instruction i.e. disposing of the loco.
All in all the loco must have done about thirty to forty trips round the track. It will be interesting to see how it performs on a full public running day!
(Further to the above I can report that the loco was steamed for a full day on two subsequent occassions and performed faultlessly. It steams well, provided it has ample firing, and is surprisingly powerful for such a small engine. MG)


copyright - David Hall
copyright - David Hall
copyright - David Hall
copyright - David Hall
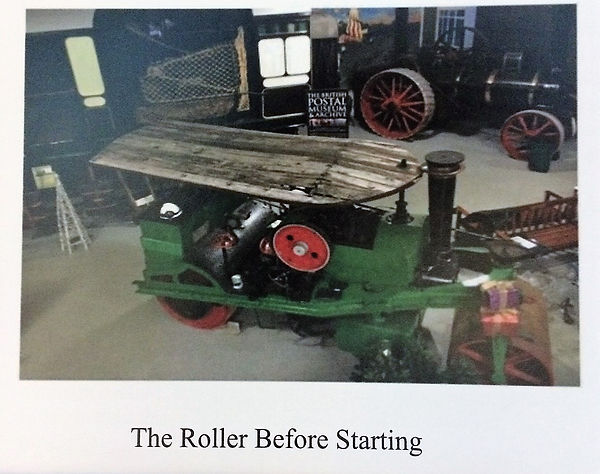
A new roof for 'Robbie' - the Robey Roller
Robbie the roller is a Kingsway heated patent roller made by Robey's of Lincolnshire (patent no 237129/1924). It is a static exhibit at Bressingham.
In November 2015 two volunteers John Rivers and Alan Spearman were asked if they would refurbish the roller and put a new roof on to replace the old one, which had rotted over the years. Below is described the process used and lessons learnt.
They can be summarised as follows -
1/ take as many photos as possible - the memory plays tricks over time.
2/ make a detailed drawing of the new roof
3/ create a working surface
4/ use the internet to research techniques
5/ take advice from staff and other volunteers at Bressingham, as they have a wealth of experience and could advise on techniques.
6/ keep referring to the photos and drawings.
This type of road roller has a narrow rear roller which makes it unstable in use - there is a history of these rollers falling over.
Stages in the refurbishment -
1/ We took many photos from every angle possible to record how the existing roof was fixed to the roller. These identified the four upright stanchions had been bent when the roller fell over. The coal box at the back of the roller had also rotted on three sides at the bottom.
2/ The existing roof was constructed from tongue and groove screwed to a solid external frame which had been made from solid wood. The front of the roof bends down and the safety valve vertical exhaust pipe exits through the roof at this point. It was identified there is a minimal clearance between the front of the roof and the chimney. The roof is under the lip of the chimney.
3/ To make removal of the roof as easy as possible individual sections of the tongue and groove were first removed. This made the roof light enough that with help from other volunteers it could be removed.
4/ A working platform was constructed from three large pallets. These were levelled and screwed together to form a stable base.
5/ Using old Bressingham plastic posters and the old roof as a template the profile of the new roof was marked out on the working platform. Key dimensions, locations of the cross beams, lengths and radius of the front of the roof were marked out on a detailed drawing and transferred to the working platform.
6/ The existing roof was constructed from a solid section of wood formed into a half circle at the front and running along both sides of the roller. This made the rim of the roof. The cross members were bolted to this rim.
7/ The roof was made from tongue and groove screwed to the exterior rim.
8/ The roof is bolted to the vertical supports by two metal cross members made from angle and formed into an arch. There are three wooden cross members following the same profile as the metal ones.
9/ The three wooden cross members needed replacing as they had rotted over time. One of these was used as a template to manufacture new wooden cross members.
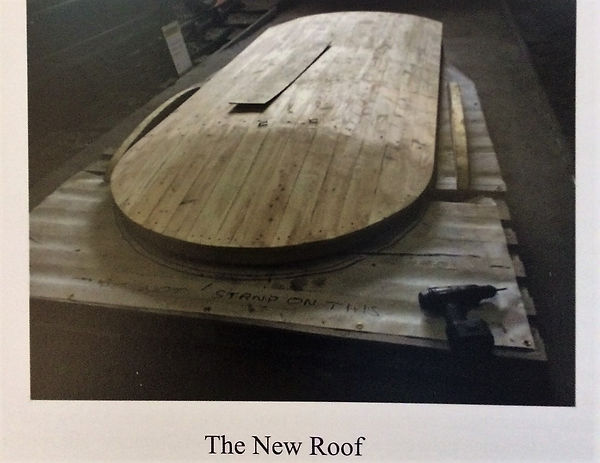
10/ To manufacture a new rim a sheet of 8ft by 4ft plywood was cut into strips, formed into the radius and glued together.
11/ Blocks of wood were screwed onto the outer and inner radius and along the length of the rim.
12/ Strips of plywood were softened using hot water to prevent cracking when bending onto the radius. It was essential the joints in the plywood strips were staggered to ensure maximum strength was maintained.
13/ Using Gorilla glue the plywood strips were joined together and multi clamps applied to pull the strips in and follow the radius.
14/ When the rim was complete the two metal and three wooden cross members were bolted in place resulting in a frame for the roof.
15/ To create the bend at the front of the roof saw cuts were made in the tongue and groove halfway through the thickness on the underside of the wood. This process is called Kerfing and examples can be found on YouTube. To assist the bending process the tongue and groove was fixed on trestles and a weight applied to the front section ahead of the Kerfing. Hot water was used to soften the wood until a bend was obtained and the Kerfing gap closed.
16/ The new tongue and groove was thicker than the original. The first section of tongue and groove was bolted on the centre line of the roof. Where the tongue was bent down at the front this section was removed and screwed onto the rim.
17/ Working up and outwards from the centre line new sections were glued up to the bend and screwed in place.
18/ At the front section where the roof pitches down it was necessary to use a small plane to taper the planks towards the front. This was needed as the planks accommodate movement in two axes, down and around the radius of the roof. This area was not glued down until all planks were known to fit.
19/ The roof was then lifted onto trestles and it was noticed the saw cuts in the Kerfing had closed when the front section of the roof was pulled down to the outer rim. Using a multi tool which had a reciprocating blade the gap was re-opened to give clearance allowing the front section to be glued and screwed in place.
20/ On the outer sections the tongue and groove were removed.
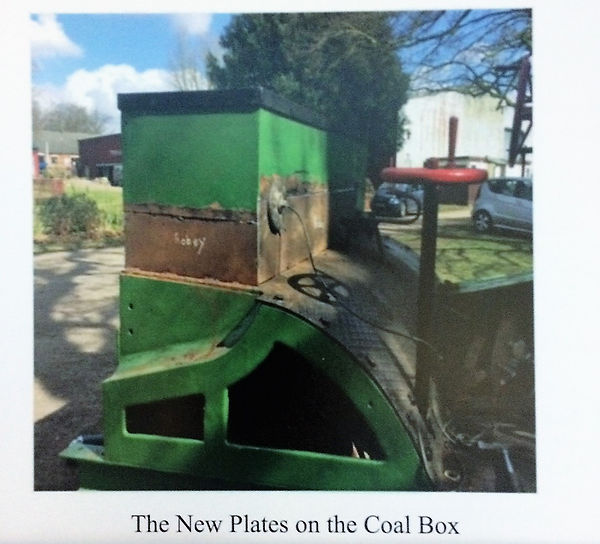
21/ The coal box at the back of the roller had rotted through on the three sides at the bottom. New sections of plate were cut, the old sections cut out and used as a template, the new metal tack welded in place and then fully welded, dressed and filled to create a smooth surface prior to painting.
22/ The damage to the coal box had been caused by fitting a section of chequer plate to the bottom of the box covering drainage holes. As the chequer plate had rusted this was removed, the drainage holes cleared and then repainted. The holes that support the vertical stanchions were drilled in the new metal.
23/ The two front vertical stanchions could be straightened in situ. The rear two had been bent in several places caused when the roller tipped over. These were removed, heated with a propane torch and straightened.
24/ To ensure the new roof would fit it was turned over and the rear vertical stanchions bolted to the metal cross beam. The centres of the stanchion to coal box were measured and a slight adjustment made by reheating and bending to obtain the correct dimensions. This provided confidence that the roof would fit when lifted on.
25/ The new roof was rubbed down, filler and sealer used where needed and then several coats of paint applied. The roof was turned the correct way up and new felt fitted to make a waterproof seal. The old roof had had no felt on it.
26/ To fit the new roof the vertical stanchions were screwed in place, the roof being carefully lifted into position by a forklift. By using a podger bar (a spanner with a tapered end) one of the two holes on the cross beam were lined up and then bolts were fitted. The roof was then fully secured in place.
27/ A sealing strip was fitted under the roof edge to hold the felt in place and provide a cosmetic finish. This was made from soft aluminium and bent to follow the profile of the outer rim.
28/ The seat was repaired and bolted back into place.
29/ A new scraping bar was fitted to the front roller.
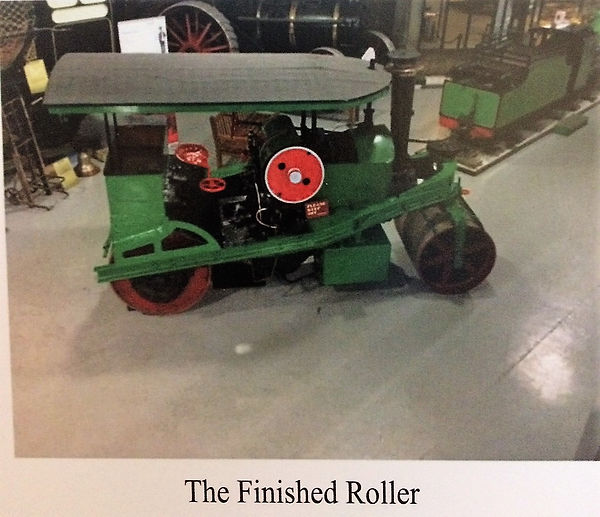
30/ Finally when the roller was moved back into the exhibition hall it was painted where required to finish the refurbishment.
Thanks are expressed to Phil in the workshop and Brian in the Horsepital for advice, loan of tools and assistance given.
John's background was in Lotus cars and Alan's in nuclear power stations, neither are 'wood' technicians and we learnt a lot.
Alan Spearman & John Rivers.